Microelectronics | Hewlett-Packard 6624A System DC Power Supply
Synopsis
This system DC power supply has two issues to fix. First, there are the dreadful RIFA film capacitors that are waiting to explode. And second there is the very noisy AC motor fan.
Otherwise, the power supply appears to be working correctly. I just made some adapter cables since this supply exposes all connection terminals at the back of the unit. With these adapters, I can easily connect any device that requires power.
Disclaimer
This article is not to be treated as a do-it-yourself tutorial on how to fix, restore, rebuild, or improve this unit. This was not my initial intention. But you can consider this whole content as a general guideline, should you decide to attempt any service procedure on an identical or similar unit.
The entire documentation is just a reflection of my work and I cannot be held responsible if you damage your unit, or even harm yourself in the process.
Repair and Maintenance
On each power supply printed circuit board, there are five RIFA film capacitors. Two are rated 22 nF / 250 V, one is rated 15 nF / 250 V and the remaining one is rated 2.2 nF / 250 V. I replaced all of them with WIMA metalized paper (MP) safety capacitors of the same ratings. Believe it or not, RIFA capacitors are still available. I hope they have changed the yellow molded resin composition. Otherwise, they'd just end up like the old ones in twenty years from now.

The small 2.2 nF parts are decoupling to the chassis ground.

Quite a weird capacitance if you ask me. I have rarely seen 15 nF capacitors in the gear that I repaired.

I find the font used by WIMA for marking the capacitance on these MP parts a bit ugly. But the fact that they're new and from a reputable manufacturer surpasses all inconveniences.
RIFA parts that are more or less cracked.

That's it for the capacitor replacement so far.
I replaced the 115 Vac fan with a Noctua S-12A FLX part. This fan should be spinning at 1200 rpm, moving 63.2 CFM at a 17.8 dBA noise level. The Noctua fan has half the airflow of the original fan. But I did some tests with the power supply at close to full load, and the ventilation system assured a good operating temperature. At least on my well ventilated workbench. If you want to make sure the power supply will work in a tightly packed 19^quot; rack, then you must find a replacement fan that complies with the original specifications.

I investigated the schematic diagram and found a non-populated 2-pin header on the GPIB PCB assembly. I just soldered a 2-pin connector and checked the voltage. I measured 13 Vdc unregulated. This should be good for the Noctua fan. The modification looks original and unobtrusive. This appears to be the new revision of the GPIB PCB assembly with SMD components. The old one was constructed using through hole components.
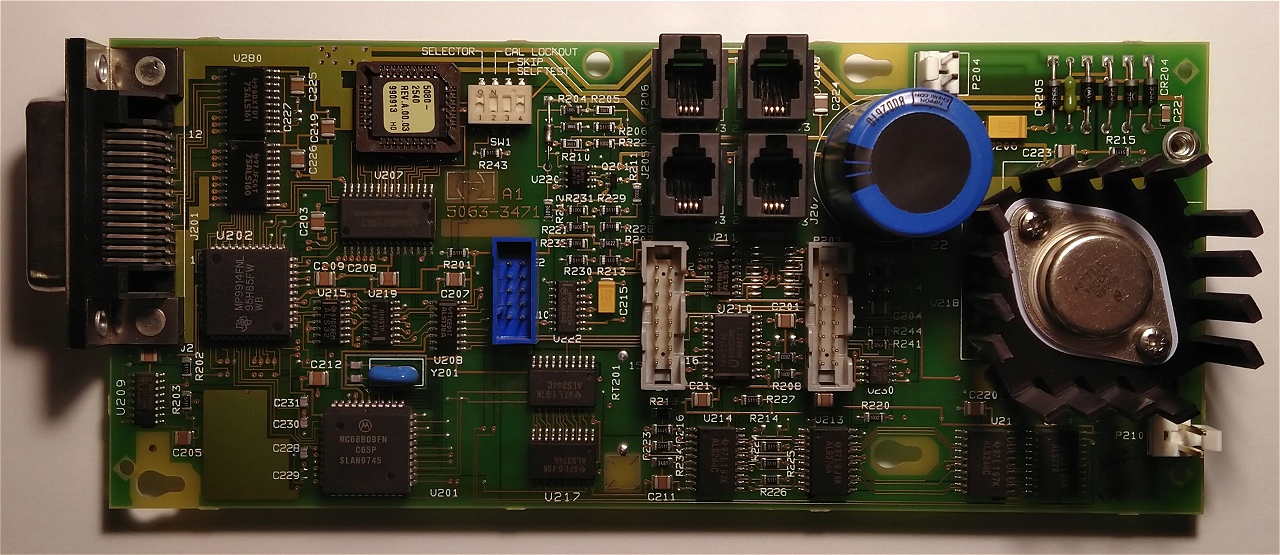
Here is the new connector that I soldered. It is designated P210.

And the solder side.

I made a connection cable from the fan to the new connector and everything appears to be OK.

Now, if I listen carefully, I can hear the mains power transformer 50 Hz hum. But overall, the unit is very quiet compared to when it had the original cooling fan.
Conclusions
This is a good power supply, albeit a bit unfriendly in terms of quick adjusting of voltage and current settings. At least, if using the front panel keyboard. If you use the computer to control the power supply settings, then things are far better.
I have looked for other possible failure points in this supply. I measured the ripple filter electrolytic capacitors, and they appear to still be in good condition. There is no obvious failure prone component despite these electrolytic capacitors.
In the end, I'm glad the updates were easy to implement.
Your Help Matters
This content is provided as-is and is not for commercial purposes. It reflects my experiments and research and should be treated as such. I release my work to the public for educational purposes. I did all this at my own expense and in my free time. So if you like my work, or find it useful or inspiring for your projects, please consider making a donation.
Copyright © 2004- Alexandru Groza
All rights reserved.
VER. 1.0 | REV. A